
Rotary Tool and 3D Print Finishing
Rotary Tool vs Hand Sanding for FDM 3D Prints: How to Choose
Compare rotary tool vs hand sanding for FDM prints: match each method to raised defects, flat panels, corners and details, then choose a useful cleanup kit.
Quick Answer
The rotary tool vs hand sanding decision depends on defect shape, access and what must remain unchanged. A suitable rotary accessory can target an isolated high spot on a robust FDM part. Supported sandpaper suits broad faces; files suit controlled edges. Fine details may need very light hand work or none. Most useful cleanup workflows combine methods.
Buyer Takeaways
- Compare the working contact, not just whether a tool has a motor.
- Use a block where flatness matters and a file where an edge needs control.
- Keep powered work local and finish the last trace by hand.
- Buy an accessory for a defined task, not for a large assortment count.
Start with the defect rather than the tool
A new rotary pen can make every rough print look like a powered-tool job. A drawer full of sandpaper can encourage the opposite habit. Neither is a useful starting point. First identify whether the print has a raised support nub, a broad layer texture, a sharp lip or a recessed scar.
Then decide what must survive: a flat mounting face, a curved silhouette, a square slot, fine lettering or a thin wall. These constraints determine the acceptable contact area and removal. A tool that removes the defect but changes the important feature has not completed the job successfully.
For example, a raised nub beside a thick rounded body is different from the same-sized nub on a miniature finger. Likewise, broad texture on a decorative panel differs from texture on a tightly fitting slide. Compare methods against those specific situations rather than asking which one is universally faster or produces the smoothest finish.
What a mini rotary tool contributes
A small approved head can concentrate removal at an accessible high spot. That is useful when the defect is distinct, the supporting wall is substantial and the working point can be seen throughout the pass. A pen-shaped body may make positioning convenient, but a secure fixture is still needed.
The same concentrated contact creates limitations. It can cut a hollow into a broad face, round a corner or reach an adjoining surface as the part turns. Friction and lingering contact can damage thermoplastic. Higher maximum speed does not establish better control over these effects.
Choose the tool only when a compatible head and documented operating setup suit the material. Test on representative scrap, use brief light contact and inspect often. If the only practical approach hides the head behind a detail or requires holding the part beside the rotating accessory, hand finishing is the better decision.
Technical Explanation
What changes during cleanup
Removal follows the contact surface. A small head concentrates it, a block spreads it across its reference face, and a file follows its working geometry. None adds missing material. Match contact to the feature you need to preserve before choosing power, grit or the number of accessories.
Buyer Comparison
Choose by the surface you need to preserve
| Task | Useful starting method | What to protect |
|---|---|---|
| Isolated raised nub on a robust wall | Confirmed rotary accessory, then hand finish | Surrounding contour and wall thickness |
| Broad flat face | Abrasive paper on a flat block | Flatness and edge definition |
| Straight slot or controlled edge | Suitably shaped fine hand file | Corners, width and locating features |
| Tiny sculpted detail | Light hand work or no removal | Relief and fragile connections |
| Recessed cosmetic scar | Compatible filler on a sound part | Geometry and coating compatibility |
What supported sandpaper contributes
Sandpaper on a suitable backing distributes contact according to the backing's shape. A flat block can help maintain a broad planar face. A carefully chosen curved backing can follow a rounded model. The paper itself does not guarantee flatness or a preserved contour; unsupported paper can round edges as it conforms around them.
Select an abrasive appropriate to the material and actual defect. Begin with the least aggressive option that does useful work, then refine the scratch pattern as needed. Do not start coarse simply because a generic sequence includes a coarse stage. That can create new scratches requiring unnecessary removal.
Hand sanding still generates dust and can damage details. Secure or support the part, use eye and dust protection appropriate to the materials, and inspect frequently. Where a filament maker recommends wet hand sanding, follow that guidance separately from electric-tool work. It does not authorize water use with a cordless rotary pen.
Where a file or no intervention is better
A fine file can define a straight edge or controlled slot wall more deliberately than a rounded spinning head. Match the file shape to the opening and use only its appropriate working surfaces. Support the print so a stroke does not bend a thin feature or force the tool into an opposite wall.
A file also removes material, so it is not automatically safe for tiny relief or fragile projections. When the defect is similar in size to the intended feature, even careful hand work may erase useful shape. Judge the model at its intended viewing distance and decide whether the improvement is worth that loss.
Leaving a harmless hidden mark can be the right result. Reprinting can be the right result when the part is cracked, badly warped or dimensionally wrong. Neither a rotary pen nor a sanding block restores missing wall strength, and cosmetic filler should not be confused with a validated structural repair.
Combine methods in a deliberate sequence
Inspect the cooled print and remove large supports with suitable hand tools, wearing eye protection. Separate supports into manageable sections rather than twisting them against the model. Identify the small high spots that remain and the surfaces that need protection.
Set up the part in padded support and arrange appropriate plastic-dust control. Trial the chosen rotary accessory on matching scrap after checking mounting, material suitability and speed limits with the tool off and charging disconnected. If the trial preserves the required shape, reduce the distinct high spot in short passes.
Stop powered work before the final trace disappears. Change to a file or supported paper that matches the geometry, clean the part and inspect again. For assembly, dry-fit without forcing it. For painting, resolve low spots with a compatible preparation system rather than sanding the entire wall down to the deepest scar. This sequence gives each method a defined purpose.
Build a small kit around your actual prints
List the shapes you finish most often. Enclosure makers may need flat backing and controlled files more often than miniature painters. Terrain builders may have substantial accessible nubs but also intentionally rough texture. Choose a fixture that holds those parts without crushing their shells.
For a rotary pen, confirm the tool's supported materials and the exact accessory connection. Check abrasive condition, replacement availability and instructions for each head. A set containing many pieces may still lack the one head appropriate to your filament and geometry. Avoid buying by accessory count alone.
Keep dust collection, eye protection and material-appropriate respiratory protection in the workflow from the beginning. Store abrasive tools separately from clean assembly parts. The useful comparison is whether the kit lets you inspect, remove only the intended excess and verify the result. Avoid treating maximum RPM or accessory count as a promise of faster cleanup.
Assess the H102 without assuming universal compatibility
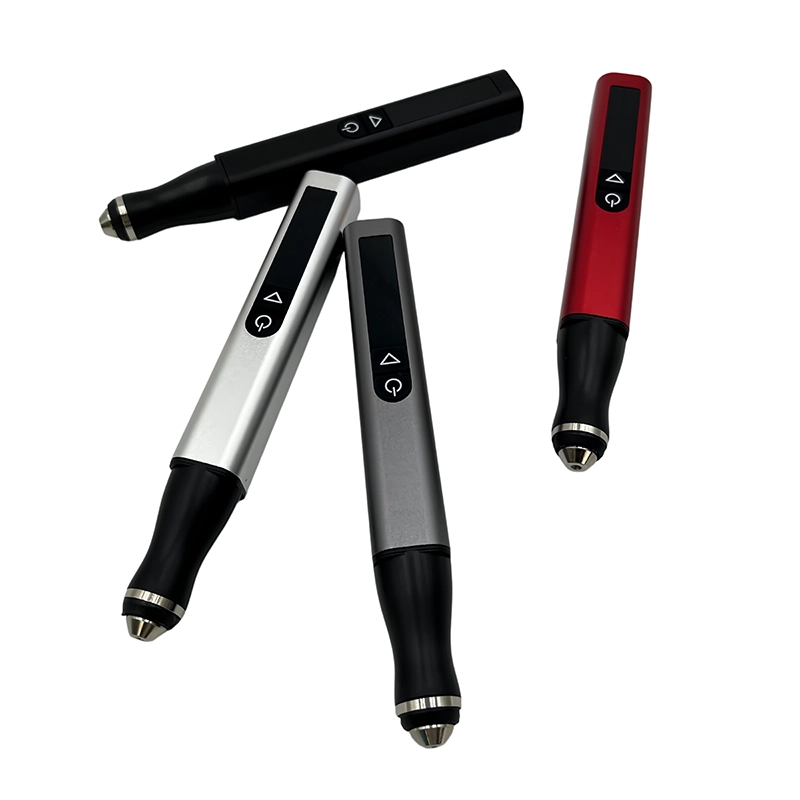
ToolQeen lists the H102 for plastic carving and hobby model making. It has a 59 g pen-shaped body, five adjustable gears and a digital display. These features support positioning and identifying an approved setting for repeat trials; they do not make flat blocks and files redundant.
The listing specifies a 2.35 mm chuck and 30 accessories. Ask which accessory suits the intended rigid FDM plastic and local operation, including the head's geometry and speed limit. A nominally similar shaft from another kit may not fit, and another brand's speed table is not an H102 table.
The published maximum is 30,000 RPM, while minimum and gear-by-gear values are not stated. Confirm the needed operating combination before purchase. ToolQeen presents a sourcing inquiry route, so individual hobbyists should check sample or single-unit availability. Choose the pen because it fills a real gap in your workflow, alongside the hand tools you will still use.
Frequently Asked Questions
Frequently Asked Questions
Is a rotary pen always faster than hand sanding?
No universal claim is justified. Setup, access, defect size and hand finishing all affect the job. A tiny lip may be simpler to address with a file than with a powered setup and scrap trial.
Which method is best for a flat enclosure face?
Supported abrasive paper is usually the more suitable starting point when flatness must be preserved. Reserve local powered cleanup for distinct excess that can be removed without hollowing the surrounding face.
Do I need both a sanding block and a file?
They solve different geometry problems. A block supports abrasive over a face, while a suitably shaped file offers controlled edge or slot work. Choose according to your prints rather than buying every shape in advance.
Can polishing replace sanding?
Not when the problem is an uneven surface or raised obstruction. A polishing operation changes the finish under its own material and accessory requirements; it does not automatically correct geometry, fill pits or erase FDM layer texture.
What should I buy first for occasional cleanup?
Identify a recurring defect and start with the simplest suitable method, plus proper support and protection. Add a rotary pen when you have accessible local work and can confirm the appropriate accessory and operating instructions.
Final Buyer Recommendation