
Rotary Tool and 3D Print Finishing
Removing Brim Remnants and Elephant’s Foot from 3D Prints
A practical guide to removing brim remnants from FDM prints, distinguishing elephant’s foot, and using local cleanup without changing the whole base.
Quick Answer
Removing brim remnants starts with separating the attached brim from the model, then checking what remains. A thin ragged lip differs from elephant’s foot, where the first layer itself is too wide. Use hand tools for broad base edges; reserve a suitable mini rotary tool for isolated, visible excess on a well-supported part.
Buyer Takeaways
- Distinguish a brim, a skirt and a widened first layer.
- Preserve the bottom face when only its perimeter needs attention.
- Check dimensions before trying to restore a tight fit.
- Correct recurring first-layer problems in the next print setup.
Identify the plastic around the base
An FDM part may leave the build plate with a ring of thin material, a rough perimeter or a base that is slightly wider than its upper walls. These features can look similar from above. Turn the cooled part over and compare its side profile with the model before deciding what to remove.
A brim touches the model and adds first-layer area. A skirt is normally separate. Prusa's skirt and brim documentation explains that distinction; its elephant-foot guidance describes how the first layer can be wider than intended. An attached brim can coexist with that widened layer, so peeling off the brim may not solve a fitting problem.
Also look for a designed chamfer, foot or flange. That feature belongs to the model and should not be removed as though it were a defect. If the part is warped or cracked, trimming the perimeter will not restore a flat, sound base.
Decide whether the base is cosmetic or functional
A display stand mainly needs a clean outline and stable contact with the shelf. A sliding insert may depend on the exact base width. A box lid can catch at one local lip while the rest of the edge already fits. Set the goal according to that function.
Check the wider region against the intended dimensions where they matter. Measure away from obvious remnants as well as across them. Do not use a forced assembly as your measuring tool: a thin socket or snap tab can break before it tells you which surface is wrong.
If the entire bottom perimeter is oversized, a small rotating head is a poor way to establish a consistent new outline. A supported hand abrasive or controlled filing approach gives a clearer reference. For a dimensionally critical part, reprinting with corrected settings may be more dependable than reshaping every side by eye.
Technical Explanation
What changes during cleanup
Brim cleanup removes an added attachment. Elephant-foot correction changes an oversized part boundary. Neither is the same as flattening the whole bottom face. Keeping these tasks separate prevents unnecessary material removal from the surface that supports or locates the print.
Remove the large brim without loading the wall
Release the print from the build surface using the printer maker's procedure and let it cool. Wear eye protection before clipping or separating material. Begin at an accessible section of the brim, and work in small pieces with an appropriate hand tool rather than pulling a long strip around the entire part.
Support the model near the area being worked without bending it. Pay attention where the brim meets a narrow leg, embossed bottom detail or thin wall. If it resists, leave a small remnant instead of levering against the finished feature. A missing corner is harder to repair than a remaining lip.
Keep the bottom face visible as you progress. Remove loose fragments from the work area before changing tools. Do not power-sand a dangling strip: it may move unpredictably and hide the boundary between the brim and the model. The rotary stage, if needed, begins only after the large loose material is gone.
Choose a controlled method for the remaining lip
A fine file suits a straight, accessible base edge when its working face can stay aligned. Abrasive paper on a block helps preserve a planar side. Use short, deliberate strokes and inspect the intersection between side and bottom. Avoid turning a square footprint into an unintended chamfer.
A mini rotary tool may help with a distinct nub on a thick base or an accessible rounded cutout, provided an approved accessory reaches it cleanly. Check the approach with the tool switched off. The chuck and unused part of the head must remain clear of the bottom face and surrounding features.
Secure the part with padded support on a robust area, wear eye protection, and arrange appropriate plastic-dust collection. Keep fingers away from the working path. If the lip runs through a deep, narrow gap that hides the point of contact, choose a hand tool or leave a harmless cosmetic trace rather than reach blindly.
Test the filament, accessory and contact together
Use matching scrap with a similar first-layer edge. Check tool and accessory instructions for plastic suitability, mounting and allowed speed. With power off and charging disconnected, inspect the head and confirm the correct shank. A loose fit, damaged abrasive or undocumented assembly is not a setup to trial on the finished print.
Use brief, light contact at a manufacturer-permitted setting. Lift away, stop and inspect for actual removal rather than a glossy smear. Continue only if the edge stays firm and the intended contour remains clear. Switch to hand finishing before the remnant disappears completely.
PLA's friction sensitivity deserves care at a thin bottom lip. PETG is not interchangeable with PLA, and modified or filled filaments introduce further differences. Do not apply a universal RPM or add water to an electric pen because a filament guide discusses hand wet sanding. Follow separate material guidance for any hand wet process, away from electrical tools.
Inspect the footprint and prevent a repeat
Clean the part, let it cool and place it on a known flat reference appropriate to the job. Check whether it sits as intended and whether any isolated projection remains. Inspect each corner rather than running the tool around the perimeter again for uniform appearance.
For assembly, test gently after cleaning all abrasive debris. If the part remains oversized, distinguish a local obstruction from a general dimensional error. A pit torn from the base needs a different decision: compatible cosmetic filler may help a display piece, but it does not restore a critical locating edge or damaged structural wall.
For subsequent prints, investigate first-layer setup and slicer compensation using the printer and slicer documentation. PrusaSlicer's elephant-foot compensation is one documented option, not a universal value to copy to every printer. Check the effect in a small trial print. Also review brim settings instead of assuming the widest or strongest attachment always gives the easiest result to finish.
Where the H102 belongs in the workflow
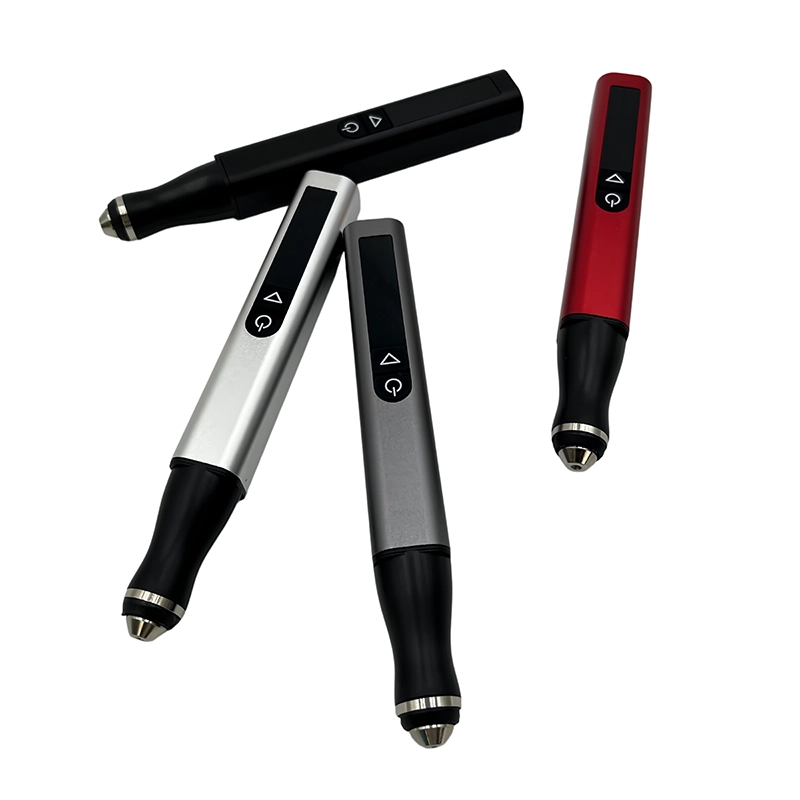
The H102's pen form is relevant to locating a small remaining nub around a robust base. Its five adjustable gears and digital display allow an approved setting to be identified during a repeat trial. The product listing gives a 2.35 mm chuck and plastic/model-making applications, but does not establish every sanding accessory or filament combination.
The listed maximum of 30,000 RPM is a product limit, not the setting to use on a brim. ToolQeen does not publish the minimum speed or each gear's RPM on this page. Confirm that the proposed head and plastic can be used within the tool's supported settings before purchase.
A 30-piece accessory count also says little about whether the specific base-edge job is covered. Ask for the head identification and instructions. For individual use, check sample or single-unit availability through the product inquiry route. Keep a hand file in the plan even if you choose a rotary pen.
Frequently Asked Questions
Frequently Asked Questions
Why is the base still too wide after the brim comes off?
The first layer may itself extend beyond the intended outline, or the model may include a flange. Compare the side profile and dimensions before removing more. Brim removal alone does not diagnose the cause.
Should I sand the entire bottom of the print?
Only if the actual task requires it and the design allows removal. For a perimeter lip, preserve the bottom face. Broad sanding can alter thickness, contact points and the position of adjoining features.
Can a rotary tool remove a skirt?
A skirt is normally separate from the model and does not need model cleanup. Remove it from the build surface according to the printer's guidance. Keep an abrasive rotary tool away from the printer's build plate.
Will higher speed make a thin lip come off cleanly?
There is no such guarantee. A thin lip can smear or deform, and a spinning head can reach the wall behind it. Use a documented accessory setup and scrap trial, or choose controlled hand removal.
What if a chunk breaks from the bottom corner?
Stop and assess the missing material. A cosmetic display edge may accept compatible filler. A locating corner or damaged wall may warrant a new print; grinding neighboring material away makes the original footprint smaller.
Final Buyer Recommendation