
Rotary Tool and 3D Print Finishing
PETG Print Cleanup: Strings, Blobs and Careful Rotary Touch-Ups
Plan PETG print cleanup by separating fine strings, raised blobs and support pits. Choose local rotary touch-ups or hand work, then check fit and surface condition.
Quick Answer
PETG print cleanup works best when fine strings, solid blobs and recessed support scars are treated separately. Remove loose strands with appropriate hand tools, then inspect the remaining geometry. A mini rotary tool can reduce an accessible raised defect on a robust section with a confirmed accessory, but it should not be used to catch strings or grind surrounding material down to the bottom of a pit.
Buyer Takeaways
- Clear loose strings before deciding which defects need abrasion.
- Use local rotary work for identifiable excess, and supported hand sanding for broader surfaces.
- Watch for smearing and loaded abrasives instead of increasing pressure.
- Recheck the fit of the actual assembled part after cleaning away debris.
Start with a clean view of the PETG part
A newly printed organizer or model bracket may look rough because fine strands cover otherwise usable surfaces. Before reaching for an abrasive, let the print cool and inspect it under good light. Identify the filament, including whether it is an ordinary unfilled PETG or a specialized blend.
This guide concerns rigid, unfilled PETG hobby prints. Carbon-filled, glass-filled and other specialty materials need their own dust controls, accessory assessment and supplier guidance. Do not transfer a successful method to them just because the product name also contains PETG.
Look at functional surfaces separately from cosmetic ones. A small blob inside a locating groove may prevent assembly, while similar texture on the back of a display model may not matter. Prioritize defects with a clear effect on fit, handling or the planned finish.
Remove strands without turning them into a rotary task
Use suitable hand tools to remove loose strings while supporting nearby details. Work where you can see the connection point, and avoid pulling a strand in a direction that bends a thin wall or tears a decorative feature. Large support structures should also be removed before fine finishing.
Do not wind stringing onto a rotating bit or brush. Loose strands are not a stable cutting target, and catching them can pull the accessory toward the model. Once the loose material is gone, inspect the attachment points again. Some may need no further attention.
A small raised stump can be considered for local cleanup. A torn-out support contact is a depression and needs a different decision. Trying to erase both with the same sanding pass may enlarge the damaged area and change a surface that was otherwise dimensionally correct.
Technical Explanation
Different defects need different actions
A string is loose material attached at small points; a blob is a solid protrusion; a pit is missing material. They can coexist on the same support contact but require different actions. The finishing sequence should expose the real surface first, then remove only verified excess and assess any recess separately.
Choose between a local touch-up and a broad finish
A fine file is useful for a visible straight edge or a minor entrance burr. Abrasive paper on an appropriate support can preserve a broad plane better than a small rotating point. Choose the support shape to suit the surface, rather than pressing soft paper indiscriminately across edges and recesses.
A rotary pen is useful when a solid local protrusion is accessible, the surrounding section is thick enough and the accessory can touch only the intended target. Do not use it to resize a whole mating cavity or flatten a large panel by eye. Those are different dimensional tasks.
Prusa's PETG guide describes sanding as a possible post-processing method. That does not select an H102 accessory or operating setting. Material guidance, accessory instructions and the actual print geometry all need to agree before powered work begins.
Confirm the accessory and test realistic scrap
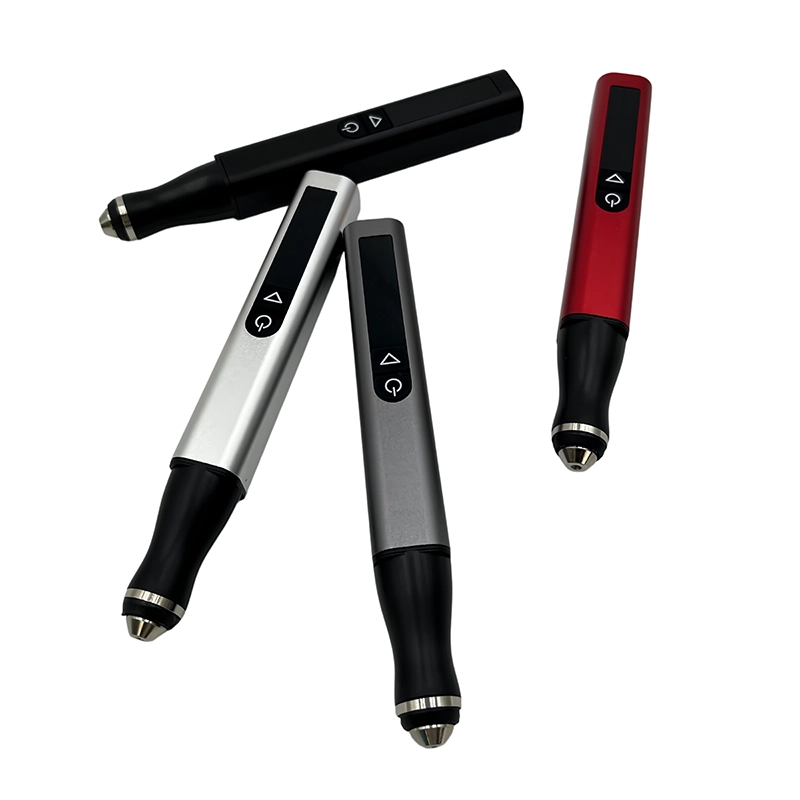
The ToolQeen H102 uses a 2.35 mm metal chuck and has five adjustable gears. Confirm the accessory's shank fit, permitted mounting, suitability for PETG and speed rating. A catalog statement of “30 accessories” does not identify the abrasive type or explain its limits.
Use a spare print from the same filament with a similar wall or defect. Secure it so it cannot move, without distorting it. Wear eye protection, collect dust near the contact area and follow the material guidance for respiratory protection. Keep the working area separate from electronics and final assembly components.
Test for controlled removal with modest contact. If the accessory grabs, chatters, loads rapidly or smears the surface, stop and reassess. Do not use a higher gear or more pressure as an automatic solution. The public H102 information does not supply a PETG-specific RPM chart.
Reduce the excess, then finish the transition by hand
For a suitable blob, work only on the portion standing above the intended surface. Keep the surrounding contour visible, use brief light contact and stop before the accessory starts removing the sound surface around it. A small amount left for hand finishing can be easier to control than a final powered pass.
Switch off and allow the accessory to stop before inspecting it or removing debris. Follow the accessory manufacturer's cleaning or replacement instructions; do not pick plastic out of a moving abrasive. If the part feels or looks affected by heat, let it cool before deciding whether more finishing is appropriate.
Hand finishing should follow the shape you want to preserve. Use a block for a flat face or a suitably shaped support for a curve. Changing to a finer abrasive should refine an acceptable surface, not disguise a gouge left by an unsuitable first pass.
Prepare the part for use, glue or paint
Remove loose dust from grooves, recesses and mating surfaces before checking fit. Test with the actual companion part rather than judging only by sight. A sanded opening may appear clean yet still bind at one corner; further work should follow the contact evidence, not a desire for uniform shine.
For an unpainted PETG part, assess whether the finish change is acceptable. A sanded patch can look different from the untouched surface. For a painted model, use a compatible filler or coating system and follow its preparation instructions. Do not assume that a paint system used on PLA is automatically suitable for this PETG formulation.
Wet hand sanding, where supported by the material and abrasive guidance, is distinct from operating an electric rotary pen around water. Keep the H102 work dry unless its manufacturer explicitly approves a different method. Complete cleaning and drying before bonding or applying coatings.
Use the defect pattern to improve future prints
Repeated strings, blobs or support damage should prompt a check of the filament and print setup. Follow the printer and filament manufacturers' guidance for drying, temperature, retraction and support configuration where relevant. Change variables deliberately and compare a small repeatable sample.
Do not use a finishing tool to compensate indefinitely for defects that occur on every copy. A better support-contact arrangement may eliminate a scar on the visible face. A corrected fit allowance may remove the need to sand an entire groove. Cleanup should complement a sound print rather than conceal a recurring failure.
Common mistakes include grinding before removing strings, confusing a support pit with a raised nub, and forcing a clogged abrasive. Stop when the raised interference is gone, the intended geometry remains and the chosen surface finish is acceptable for the part's actual use.
Frequently Asked Questions
Frequently Asked Questions
Should I use a rotary brush to remove PETG strings?
This guide does not recommend catching loose strings with a rotating accessory. Remove them with suitable hand tools first. A remaining solid attachment nub can then be assessed as a separate local finishing task.
Why does the abrasive collect plastic instead of cutting cleanly?
The accessory, contact conditions or material may be unsuitable for that operation. Stop, inspect after the tool has fully stopped, and follow cleaning or replacement instructions. More force can worsen the surface instead of solving the cause.
Can PETG use the same setting as my PLA test piece?
Do not assume so. The exact filament and accessory matter, and the printed section may also be different. Test representative PETG scrap within the confirmed operating limits rather than copying a setting from another polymer.
Does a white or dull sanding patch mean the part is ruined?
It needs inspection. Surface texture can change appearance, while whitening near a stressed feature may indicate damage. Check for cracks, distortion and lost dimensions before deciding whether to leave, finish, repair or reprint it.
Can I fill a deep support pit and paint over it?
A compatible cosmetic repair may be suitable on a sound noncritical display surface. It does not automatically restore a weakened wall or functional feature. Assess the remaining part and follow the filler and coating instructions.
Final Buyer Recommendation