
Rotary Tool and 3D Print Finishing
Finishing Seams on Multi-Part 3D Prints Before Painting
A practical guide to finishing seams on multi-part FDM prints: align pieces, distinguish ridges from gaps, use local cleanup, and prepare for a painted finish.
Quick Answer
Finishing seams on multi-part FDM prints starts with alignment and a sound joint. Reduce isolated raised plastic only where a supported tool and accessory can reach it safely. Fill cosmetic gaps with a compatible product rather than grinding both sides down. Refine the final surface by hand before primer, preserving the model's intended contour and assembled dimensions.
Buyer Takeaways
- Dry-fit and align parts before committing to adhesive.
- Treat a raised ridge differently from a gap or step.
- Follow adhesive and filler curing instructions before finishing.
- Preserve the assembled silhouette while blending the seam.
Read the joint before trying to hide it
A seam across a large display model can remain visible for several reasons. Two edges may align but leave a narrow gap. One part may sit higher than the other. A local support nub may prevent full seating. Glue squeeze-out is yet another material with its own finishing requirements.
Dry-fit the parts and inspect the joint under side lighting. Compare the overall silhouette as well as the line itself. If alignment is wrong, sanding can disguise one view while making the model asymmetric or thinning one half. Correct the assembly problem before treating it as a surface problem.
Decide whether the seam is meant to disappear. Some joints represent panel boundaries or allow a component to be removed later. Filling and painting across those interfaces may defeat the design. Separate permanent cosmetic seams from service joints, intentional grooves and moving connections at the planning stage.
Prepare mating faces without rounding their edges
Remove support remnants and loose material from each mating surface using suitable hand tools. Wear eye protection for clipping, support the neighboring body and avoid levering on an alignment pin. If the face must remain flat, supported abrasive paper or a fine file offers a clearer reference than a small rotating head.
Prusa's assembly guide emphasizes clean mating surfaces and choosing adhesive according to the material and use. Follow the actual adhesive manufacturer's preparation instructions: some surfaces need a particular texture, and a glossy appearance is not a universal goal. Clean away abrasive debris before bonding.
Dry-fit again after any correction. Check whether pins, sockets or hidden support nubs are holding the halves apart. Do not remove an entire face just because the joint feels tight. A local obstruction deserves a local remedy, while warped halves or incompatible dimensions may justify revising the print.
Technical Explanation
What changes during cleanup
A stepped joint combines an alignment problem with a surface problem. Removing the high side changes its wall and outline; filling the low side changes the outer contour. Establish correct alignment first, then decide which small remaining features require removal or addition.
Establish the joint before cosmetic finishing
Use an adhesive explicitly suitable for the filament and intended application. Follow its instructions for ventilation, protection, application, clamping and curing. Temporary handling strength is not necessarily the point at which a joint is ready for sanding or further loading.
Maintain alignment while the adhesive cures. Use support that does not crush the shell or pull a thin edge out of shape. Do not try to correct a shifting joint by pressing a rotary head against it. Abrasive work belongs after the joint is sound and the relevant product instructions permit it.
Inspect cured squeeze-out separately from printed plastic. ToolQeen's plastic/model-making listing does not automatically establish suitability for every adhesive or filler. Unless the tool, accessory and added material all support the operation, use an appropriate hand method according to the adhesive or filler maker. Do not grind partially cured material as a shortcut.
Use the rotary pen for a defined plastic high spot
An accessible raised plastic nub beside a seam may be a suitable local task. Secure the assembly in padded support on a robust area and check the approach with the pen off. The head must not bridge the joint and cut the lower side while removing the higher spot.
Arrange suitable dust extraction, wear eye protection and follow the materials' respiratory-protection guidance. Inspect the head and mounting with power off and charging disconnected. Confirm plastic suitability, shank fit and permitted speed. Trial the combination on matching scrap with comparable wall thickness before approaching the finished model.
Make brief, light contact on the identified excess, lift away and inspect with the tool stopped. Stop while a slight trace remains and finish by hand. If the plastic smears, the joint flexes or the head catches the seam, discontinue the pass. An intact bond and preserved contour matter more than keeping the motor working.
Fill missing surface instead of lowering the whole model
A shallow cosmetic gap below the intended surface may need compatible filler. Choose it with both the filament and final coating in mind, follow its safety instructions and allow the specified cure. Test the complete filler-and-coating combination on spare material where appearance matters.
Apply only as the product directs, then refine with an appropriate hand abrasive. Support the abrasive to follow the surrounding form. A flat block suits a planar joint; a curved section needs a backing and motion that preserve the curve. Inspect the boundary because filler and plastic may wear at different rates.
Do not assume that a filled seam is a strengthened joint. Filler may hide a cosmetic gap while leaving a weak bond underneath. Cracking, movement or poor alignment needs a structural or assembly decision before finishing. A replacement part can be preferable to building an increasingly thick cosmetic repair over an unstable seam.
Inspect before and after the first coating stage
Clean the assembly and view it under side lighting from more than one direction. Look for a ridge, trough, flat patch and loss of symmetry. Check adjoining features such as panel lines and raised trim, which can be softened while the seam itself seems to improve.
Prepare for primer according to the coating instructions, preserving mating surfaces that still need assembly. A suitable primer can reveal small surface differences, but it should not be treated as a guaranteed gap filler. Let it reach the required stage before any permitted hand refinement or recoating.
If a seam reappears, identify the cause rather than adding another coat automatically. There may be residual surface relief, an incompletely prepared repair or movement at the joint. Check the adhesive and filler guidance. Avoid powered sanding across a mixed stack of unknown coating, filler and plastic without explicit material and accessory support.
Choose the H102 for the plastic work it can support
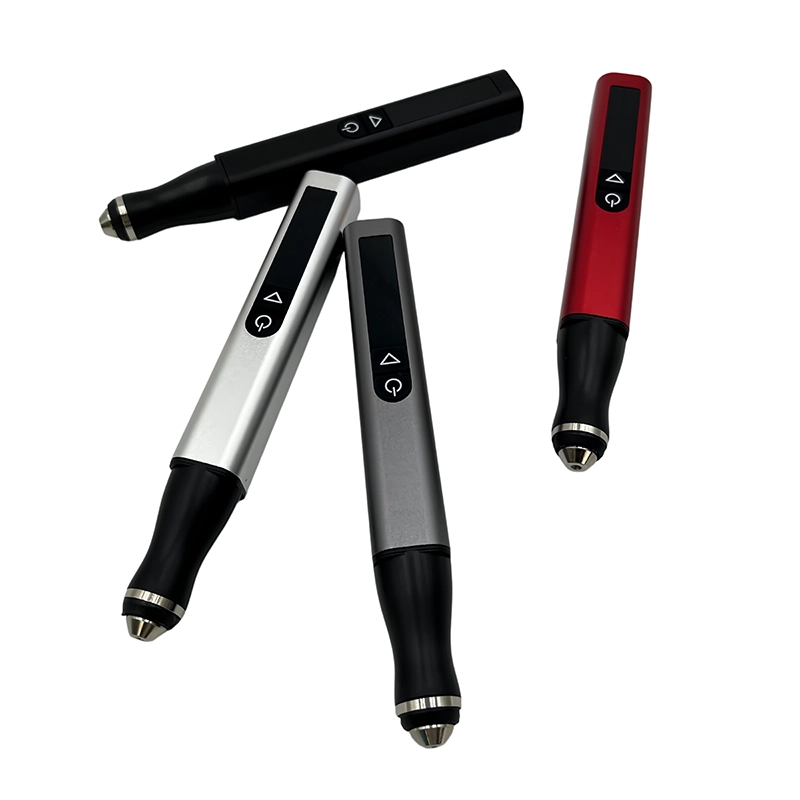
The ToolQeen H102 is relevant to local printed-plastic cleanup because its listing includes plastic carving and model making. The pen-shaped 59 g body can help position the head at a visible protrusion; five adjustable gears and a digital screen help identify an approved trial setting.
The page specifies a 2.35 mm chuck and 30 accessories. It does not establish which head is suitable for your filament, cured adhesive or filler. Keep those materials separate when asking about a configuration. A head approved for plastic is not automatically approved for every substance applied to that plastic.
The listed maximum of 30,000 RPM is not a seam-finishing recommendation, and individual gear speeds are not published. Confirm the supported setting and accessory before use. ToolQeen's product page supports inquiries; individual makers should ask about single-unit or sample availability and keep hand finishing tools in the purchase plan.
Frequently Asked Questions
Frequently Asked Questions
Should I sand a seam before or after gluing?
Prepare mating faces and remove obstructions before bonding. Cosmetic blending comes after alignment and the adhesive's required cure. Some parts are better painted separately, so plan assembly order before committing to a permanent seam.
Can I grind off cured glue with the same head as PLA?
Do not assume compatibility. The adhesive is a separate material with its own dust and finishing guidance. Confirm tool and accessory support, or use an appropriate hand method specified for the cured adhesive.
Will filler make a weak joint strong?
Do not rely on cosmetic filler for that purpose. Check the bond, alignment and intended load first. A repaired surface can look continuous while the underlying assembly remains weak or capable of movement.
How do I avoid a hollow beside the seam?
Use the surrounding contour as a reference and finish with supported hand abrasives. Check both sides often. Different materials can wear at different rates, so more sanding is not automatically the answer to an uneven boundary.
Why is the seam visible again after primer?
Primer may reveal residual relief that was hard to see in bare plastic. Inspect the geometry and repair condition, and follow the coating's rework instructions. Also rule out movement at the joint before adding more material.
Final Buyer Recommendation