
Rotary Tool and 3D Print Finishing
Cleaning Support Marks on Curved FDM Prints: A Practical Guide
A guide to cleaning support marks on curved FDM prints: preserve the silhouette, distinguish bumps from pits, test accessories, and blend repairs by hand.
Quick Answer
Cleaning support marks on a curved FDM print requires preserving its silhouette as well as improving its surface. Reduce isolated raised contacts only where an approved accessory can reach a substantial wall. Change the viewing angle frequently, finish by hand and treat recessed scars separately. A smooth patch is not successful if it flattens the intended curve.
Buyer Takeaways
- Judge a curved repair from several directions.
- Separate raised contact nubs from torn-out depressions.
- Match abrasive contact to the local curve and available clearance.
- Protect adjacent ridges, undercuts and thin shells.
Map the marks around the curved surface
A rounded figurine torso, decorative vase or curved prop section can show an uneven band where supports touched it. That band may contain several kinds of defect: isolated raised nubs, rough overhang texture and small hollows left when attachments separated. Work out which is which before trying to smooth the band as a whole.
Use side lighting and turn the part slowly. Compare the silhouette with an unaffected section or the digital model. A protrusion may be obvious from one angle and invisible from another. Mark the work area in a way that will not interfere with the intended coating, or keep a simple photograph for reference.
Check wall thickness and construction too. A large rounded surface can be a thin shell rather than a solid mass. Exposed infill, a split layer or flexing under gentle support changes the decision: a cosmetic abrasive pass cannot restore sound structure beneath the curve.
Remove the support body before refining its contacts
Wear eye protection while separating the main support. Divide it into smaller sections with suitable hand tools so that a large tree does not act as a lever on the shell. Support the model near the contact, using robust features rather than gripping delicate projections.
Where a stubborn attachment remains, leave a small raised portion for later instead of tearing it out. Prusa's PETG guidance notes the material's strong layer adhesion and support-removal difficulty. That is a reason to examine how an attachment will release, not to assume more pulling force is appropriate.
Collect loose pieces before abrasive work. Secure the print in a padded fixture that cradles the body without distorting it, and reposition it to expose the next area. Arrange dust extraction suitable for fine plastic debris and respiratory protection according to the materials involved. Keep hands, hair and loose clothing outside the rotating tool's path.
Technical Explanation
What changes during cleanup
Curvature changes the contact area as a head moves. A tool that touches only a nub at one angle may touch intact material after the model rotates. Inspect both the local surface and the complete silhouette; neither check alone proves that the original form has been preserved.
Choose the working surface, not just a small head
On a convex surface, a narrow abrasive can leave a flat or a hollow if it stays in one location. On a concave surface, an oversized head may bridge the recess and cut its rim first. A pointed head may reach the center yet carve a groove. Access alone does not mean the contact shape is suitable.
With the tool off, check the entire approach. Consider where the head will touch as it moves, and where the shank or chuck could hit an adjacent ridge. If the mark lies behind a fragile lip or inside a blind undercut, a shaped hand abrasive or small file may offer a clearer path.
Select only a head documented for the plastic and operation. Use its prescribed mounting and permitted contact surface. Do not adapt another brand's accessory arrangement merely because it looks similar. For a broad gentle curve, hand sanding with an appropriate backing often gives better control of the overall form.
Use a scrap trial that represents the shell
A trial on matching filament matters, but shape matters as well. Choose a failed curved section or coupon that resembles the wall thickness and support attachment. A thick flat test piece can hide the flex and changing contact area that cause trouble on the real model.
Inspect the accessory with the pen off and charging disconnected. Check shank fit, condition and speed limits. Use a manufacturer-permitted setting suited to both accessory and plastic, then apply a brief, light touch to the raised material. Stop and inspect the cooled result before trying another pass.
Watch for a reduced high spot with no flattened outline, smeared plastic or new gouge beside it. PLA and PETG require separate trials, as do different blends. If the only way to reach the remnant puts the head against an untested thin edge, choose a hand method. A successful trial elsewhere on the model does not resolve that access problem.
Preserve the curve through short local corrections
Work one identified high spot at a time. Keep contact brief and lift away to examine it, with the tool stopped. Rotate the secured model between passes so you can compare the repair with the surrounding curvature. Do not follow a whole support band in one continuous sweep.
Stop powered removal while a slight raised trace remains, then blend it by hand with backing appropriate to the shape. A flat block belongs on a flat reference area; on a rounded body, choose a hand approach that follows the intended curve without concentrating all pressure at one point.
Inspect from the front, side and along the tangent of the surface. If a local flat appears, do not automatically remove the rest of the curve to match it. Reassess whether a cosmetic fill or a new print is preferable. Repeatedly “blending out” a mistake can spread a small defect over a much larger visible area.
Deal with hollows before the paint stage
A support scar below the intended contour is missing material. Further grinding cannot fill it. For a cosmetic model, choose a filler compatible with the filament and planned coating, follow its safety and curing instructions, and trial the finish on scrap. A thin or cracked shell may need replacement instead.
Use hand abrasives to refine a cured repair according to the filler manufacturer's guidance. The filler and printed plastic may not abrade at the same rate; inspect the boundary rather than assuming an even-looking color means an even surface. Avoid sanding a trough around a harder patch.
Remove dust and check the model under side lighting before primer. Primer can help reveal remaining surface defects, but it should not be expected to bury large support nubs or bridge damaged walls. Keep any mating surfaces and designed recesses clean and dimensionally intact. Check assembly again before applying coatings that may affect clearance.
Use the H102 as a local finishing option
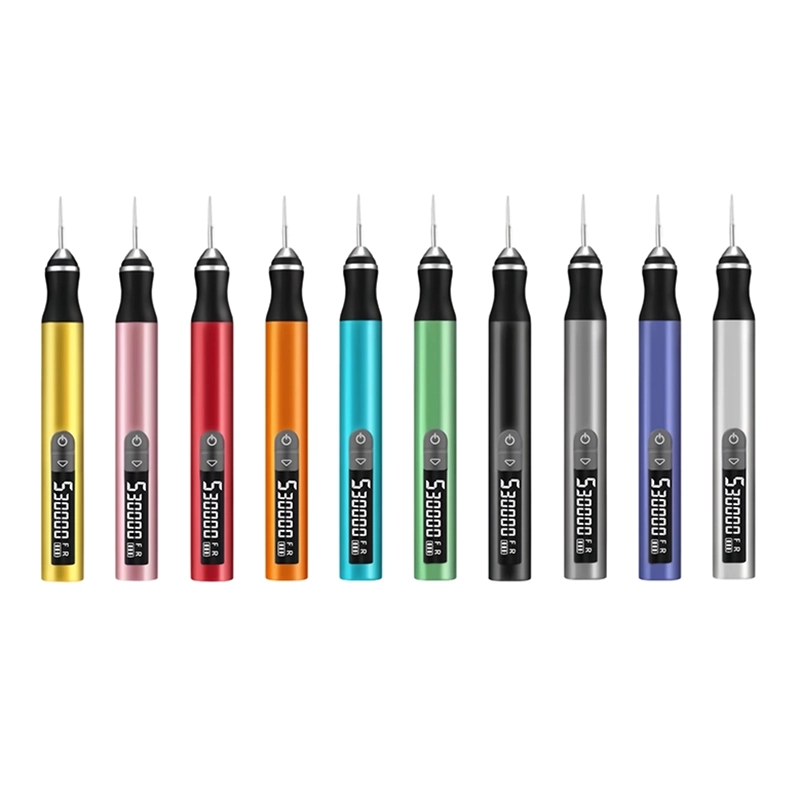
The ToolQeen H102's pen-shaped body can help place a working head near a visible support contact. Its listed five adjustable gears and digital screen are useful for identifying the same approved setting during repeated trials. The product page lists plastic carving and hobby model making, making it relevant to this type of careful local work.
Selection still depends on the head. The H102 lists a 2.35 mm metal chuck and 30 accessories, but the page does not identify every grit or establish a head for every concave shape. Confirm the proposed accessory's dimensions, material suitability and permitted operation. A 3.2 mm shaft is not a direct substitute.
The published maximum speed is 30,000 RPM; minimum and individual gear speeds are not given. Do not treat that maximum as a setting for a thin FDM shell. Ask through the product page about the appropriate configuration and individual or sample availability before ordering.
Frequently Asked Questions
Frequently Asked Questions
Can I make the whole supported underside perfectly smooth?
That depends on the geometry, remaining wall and finish you need. Local cleanup can improve raised contacts, but widespread overhang texture may require hand preparation and compatible filler. Complete removal of every trace is not guaranteed.
Why does a repaired curve look flat under light?
Material may have been removed across a small area instead of only from the nub. Stop and compare the silhouette. Do not expand the flat patch just to make the reflected light look uniform.
Is a spherical head always best for a rounded model?
No. The working surface, diameter, abrasive, permitted use and clearance all matter. A rounded head can still make a hollow. Match the accessory to the actual local contact and verify it on representative scrap.
What should I do with a support pit?
Assess whether it is only cosmetic. A compatible filler may rebuild the surface of a sound display piece. A pit exposing infill or weakening a thin wall may be a reason to reprint instead.
Can I hold a small model in my fingers while grinding?
Use a suitable fixture so your fingers are not the clamp beside the rotating head. If no robust area can be secured without damage, use a hand method or leave the feature untouched.
Final Buyer Recommendation