
Rotary Tool and 3D Print Finishing
Cleaning Raised Text on 3D Prints Without Blurring the Letters
Clean raised text on 3D prints while preserving letter edges and small openings. Compare local rotary cleanup, hand finishing and changes for the next print.
Quick Answer
Cleaning raised text on 3D prints is a visibility problem as much as a surface-finishing task. Remove loose strands first, then distinguish a printing burr from the intended letter stroke. A rotary pen may trim a large, accessible defect beside robust lettering, but fine files or supported abrasive paper usually give better control near narrow strokes, enclosed letter spaces and sharp corners.
Buyer Takeaways
- Preserve stroke width, letter height and the openings inside characters.
- Use the intended viewing distance to decide whether a defect needs attention.
- Test any surface treatment on spare text printed from the same filament.
- Improve the next model's lettering when the printed detail is too small to recover.
Decide what needs to remain readable
A nameplate, drawer label and decorative sign have different success criteria. A drawer label must be readable quickly; a display sign may also need consistent color and sheen. Before finishing, view the print from the distance at which someone will actually use it. A minor layer texture may be less distracting than a sanded patch.
Compare the letters with the model or a clear reference. Check the thin stroke of an R, the gap in an e and the small enclosed area of an A. Those details are part of the character, not empty space that can be widened freely.
Set a practical target such as “remove the strand connecting these two letters” or “reduce the support nub on the blank margin.” Avoid a vague goal of making all text perfectly smooth. That can lead to removing readable detail that was already acceptable.
Sort strands, raised defects and missing strokes
Loose strings may cross between characters without being part of either letter. Remove them with suitable hand tools while supporting the print. Do not try to catch them with a rotating accessory; loose material can move unpredictably and drag the contact point toward the lettering.
A raised blob at a stroke edge is different from a gap caused by missing extrusion. The blob may be reduced; a missing stroke cannot be recovered by sanding neighboring strokes thinner. A recessed support scar beside a letter may need a compatible filler if the piece will be painted, but that filler must not bury fine details.
If several letters are partly absent or fused together, examine the sliced model. Finishing is unlikely to reconstruct geometry that never printed. Increasing text size, changing the font or adjusting the model can be a more useful next step than trying to carve tiny letters freehand.
Technical Explanation
Judge the complete word
Letter readability depends on relationships: stroke width compared with spacing, raised height compared with the background, and surface contrast under light. Removing a small amount from every edge can change those relationships substantially. A cleanup method should therefore be judged on the complete word, not just on whether one sanded edge feels smooth.
Choose contact shapes that respect the lettering
For a broad blank margin, abrasive paper on a flat support can preserve the panel's plane. A suitably shaped fine file may reach a clear straight edge. Do not drag a flexible abrasive strip across raised letters if it will round their tops or bridge over different heights.
A rotary pen is best reserved for a larger isolated nub on a robust area with room around it. Its working surface must fit the target without overlapping a neighboring stroke. A tiny tip is not automatically precise if its shape hides the contact point or requires an awkward approach.
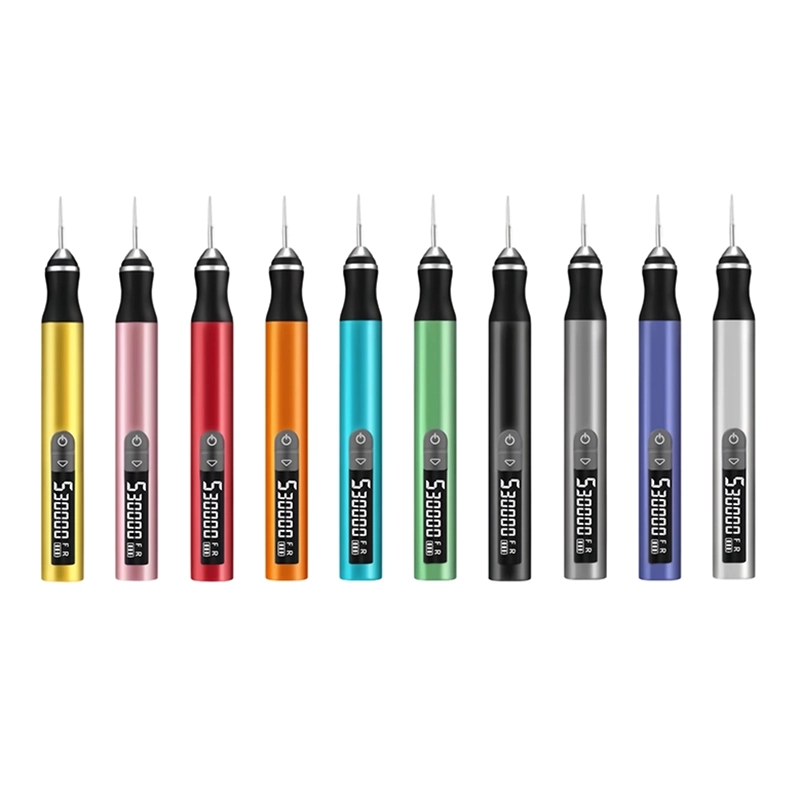
The H102's pen-shaped body can make a localized approach easier to position than a larger handpiece. That is a handling consideration, not a measured accuracy claim. Confirm a compatible accessory for the exact plastic and operation; the 2.35 mm chuck alone does not establish suitability.
Make a small text sample before changing the finished part
When appearance matters, print a spare strip using the same text height, orientation, filament and surface settings. A flat offcut can reveal melting or scratching, but it cannot show how easily a thin letter stroke will be lost. Include the smallest character openings in the sample.
Secure the sample on a stable support, wear eye protection and arrange appropriate dust collection. Keep the intended work area illuminated from the side so edges remain visible. Mount and inspect the accessory with the tool off, following the manufacturer's instructions.
Trial the proposed hand or rotary method and inspect it at both close range and normal viewing distance. Look for changed sheen, rounded strokes or reduced contrast. Do not interpret five adjustable gears as five validated settings for lettering; the useful setting must remain within the confirmed tool and accessory guidance.
Work from robust areas toward delicate details
Remove large support remnants away from the lettering first. Then address the blank margins and other robust features that genuinely need correction. Leave the narrow letter edges until you have a clean view of them, and use hand finishing or no further removal where powered contact would overlap the character.
With an approved rotary setup, keep contact brief and light on the identified excess. Stop before the surrounding surface becomes the cutting target. Switch off and wait for the accessory to stop before clearing dust or repositioning the print.
Frictional heat can smear PLA and soften a sharp edge. Other filament formulations require separate checks, including decorative or filled materials. If the target becomes glossy, fuzzy or distorted, stop rather than trying to restore it with more pressure. Keep electric-tool operation dry unless that exact tool explicitly supports another method.
Finish for the chosen color and coating scheme
For an unpainted label, compare the cleaned area with untouched plastic under the final lighting. Sanding may leave a visible change in sheen even when the geometry looks better. A small remaining defect can be preferable to a large matte patch across a decorative face.
For painted text, confirm that the primer and paint are compatible with the print material. Clean away dust and follow the coating manufacturer's preparation and cure instructions. Avoid using heavy primer to fill every small gap around characters; it can close spaces that make letters distinct.
Inspect the final result before attaching the label to an organizer or model. Check for loose strands, sharp protrusions and clogged character openings. If adhesive is used on the back, keep that bonding surface free of incompatible coatings and abrasive residue.
Improve the next print instead of erasing this one
PrusaSlicer's Text tool provides a documented way to add labels and version numbers before printing. For future parts, evaluate the letter size, stroke thickness, spacing and placement in the sliced preview. Features that remain distinct there have a clearer chance of surviving printing and modest cleanup.
Move support contact away from important letter edges when the model and print orientation allow it. Test a small section before producing a large sign. These changes address the cause of unreadable detail rather than asking a finishing tool to reconstruct it afterward.
Common mistakes are sanding all letter tops together, widening counters until the font changes, and engraving over missing text without a plan. Stop when the message is readable, the intended edges remain recognizable and the surface treatment suits the final appearance.
Frequently Asked Questions
Frequently Asked Questions
Can a rotary pen sharpen blurry printed lettering?
It cannot reliably reconstruct detail that failed to print. On large lettering, a confirmed accessory may remove an isolated burr beside a sound stroke. For generally blurred characters, revise the model or print setup and try a small test strip.
Should I sand across the tops of all the letters?
Only if that is an intentional, tested finish with enough material allowance. Routine sanding can reduce height and round strokes unevenly. Inspect the actual problem first and preserve text that is already readable.
How do I clear the small space inside an A or R?
Use a suitably sized hand tool only when you can see and control the contact. Do not force a rotating tip into a confined space. If the opening is fused throughout, reprinting revised text may give a better result.
Can filler repair a missing part of a letter?
Possibly for a cosmetic model with a compatible repair system, but it becomes a small reconstruction task. It is not solved by ordinary sanding. Compare the effort and likely readability with printing a corrected replacement label.
Will polishing restore the original filament sheen?
There is no general guarantee. The abrasive, plastic and original print surface all affect the appearance. Test a representative sample before treating visible lettering, especially with silk or multicolor filament.
Final Buyer Recommendation