
Rotary Tool and 3D Print Finishing
Cleaning 3D Printed Magnet Pockets Without Losing the Fit
Clean 3D printed magnet pockets with controlled local trimming, careful depth checks and dry fitting. Learn where a rotary pen helps and when to reprint.
Quick Answer
Clean 3D printed magnet pockets by identifying the small burr or support remnant that blocks insertion, rather than enlarging the whole recess. Work on an empty, accessible pocket, preserve its floor and sidewalls, and check the actual magnet's dimensions separately. A rotary pen can trim visible excess on a robust rim; deep pockets, thin floors and already-installed magnets call for a different approach.
Buyer Takeaways
- Keep magnets out of the part while performing powered plastic cleanup.
- Check diameter, depth and intended adhesive space as separate dimensions.
- A local rim burr is a cleanup task; an undersized cavity is a fit problem.
- Preserve retention and alignment when deciding whether the result is acceptable.
Understand what is supposed to hold the magnet
A magnet in a removable model panel may be retained by adhesive, a designed interference fit or a separate mechanical feature. Those arrangements require different clearances. Before removing material, identify the intended retention method from the design. Do not convert a planned press fit into a loose adhesive fit by accident.
Measure the actual magnet and compare it with the pocket specification. Nominal dimensions on a product listing do not tell you how that individual magnet and printed recess will mate. Check depth as well as width: a magnet standing proud may have reached a floor obstruction, or the pocket may simply be too shallow.
This workflow is for open recesses in ordinary rigid FDM display models. Magnets embedded during a paused print are a separate design choice, described in Prusa's article about print pauses and inserted objects. Do not grind through a finished wall to reach an enclosed magnet.
Diagnose the obstruction before choosing a tool
Inspect the empty pocket under angled light. A raised lip at the entrance, a stray extrusion on one wall and a small support bump on the floor are three different targets. A shadowed recess can also make an intact floor look uneven, so change the viewing angle before deciding to cut.
If the opening is too narrow all around, local deburring will not reliably establish the correct diameter. If the floor is already thin, lowering it to gain depth may break through the outer face. Check the model or sliced wall structure rather than assuming that every pocket has spare material underneath.
A recessed gouge will not be fixed by sanding the rest of the floor down to match it. Decide whether the remaining geometry still supports the intended adhesive and alignment. For a badly distorted recess, revising the pocket and reprinting is more predictable than progressively hollowing out the part.
Technical Explanation
Check all three pocket requirements
Pocket diameter controls lateral position; floor depth controls installed height; retention depends on the chosen fit or adhesive system. Improving one dimension can damage another. This is why a visible burr should be treated as a local feature, and why the acceptance check must include the completed mating assembly rather than the recess alone.
Select access, not just a small-looking bit
A small accessory can still be too large for a recess if its working surface touches the opposite wall. Check the whole approach path, including the shank and chuck. You need to see the contact point and withdraw without catching an edge. Do not extend an accessory beyond its permitted mounting depth to reach farther.
Use a fine hand file for an accessible straight wall or entrance lip when its shape matches the target. A supported hand abrasive may suit a broad pocket floor. A mini rotary tool is most useful at a visible local protrusion with enough surrounding clearance and wall thickness.
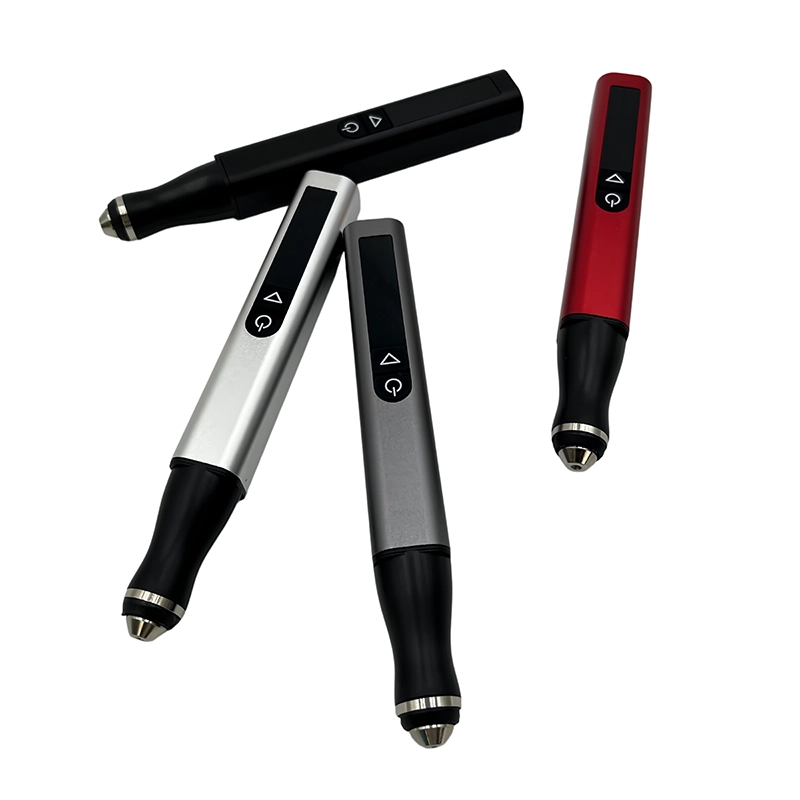
The H102's 2.35 mm metal chuck and five adjustable gears are relevant selection details. They do not establish that an arbitrary small cutter, sanding drum or extension is compatible. Ask ToolQeen to confirm the accessory for the plastic, contact direction and recess geometry you intend to finish.
Secure the empty part and prove the method on scrap
Remove loose magnets and nearby metal hardware from the work area. Never sand or grind the magnet itself as a way to fit the pocket. Hold the plastic component in a padded fixture that supports the surrounding structure without squeezing the recess out of shape.
Wear eye protection and collect plastic dust at the work area using a suitable setup. Keep loose clothing, hair and fingers away from the rotating accessory. Fit and inspect the accessory with the tool off, following the tool and accessory instructions. Keep the operation dry; this guide does not authorize liquid cooling with the H102.
Test on a spare pocket printed from the same filament if available. Otherwise use a representative scrap section, recognizing that a flat coupon cannot prove access inside a recess. The test should show controlled material removal without grabbing, surface smearing or visible damage to the neighboring wall.
Trim the identified excess and stop before fitting
For a suitable rim bump, make a brief, light contact on the excess only. Do not sweep around the complete circumference merely to make the finish uniform. That changes the pocket's size while providing little evidence about the original obstruction. Stop and inspect before another pass.
PLA can soften from concentrated friction. PETG and other polymers also need their own material and accessory checks; greater heat resistance does not make prolonged contact harmless. If the surface becomes shiny, stringy or smeared, stop, allow it to cool and reconsider the method rather than pushing harder.
Switch off and let the accessory stop completely before removing debris or checking fit. Keep magnets away from the rotating tool. Once the part is clean, assess depth and entrance clearance again. Do not force a magnet into a marginal opening that you may be unable to remove without damaging the print.
Assemble only after fit, polarity and cleanliness are settled
Check paired magnet orientation away from the finishing area, then keep the intended orientation clearly identified during assembly. A correctly sized pocket does not prevent a polarity mistake. Plan how the parts will be held while the adhesive cures, without relying on magnetic attraction to establish precise alignment.
Use an adhesive suitable for both the printed material and the magnet's surface, following its manufacturer's preparation and cure instructions. Avoid leaving dust in the recess or adhesive where it will prevent the panel from closing. If the design requires adhesive space, include it in the fit assessment instead of filling an arbitrarily enlarged cavity.
For a painted model, decide which surfaces will remain uncoated so paint buildup does not change the seating. Test the assembled parts after the specified cure and coating process. If a small magnet can detach, the assembly is unfinished; store loose magnets safely away from children and pets.
Recognize the mistakes that destroy a usable pocket
The most common dimensional error is enlarging the opening when the real problem is a bump on the floor. The reverse also happens: repeatedly deepening the recess when a rim burr prevents the magnet from entering far enough. Diagnose width and depth independently after cleaning away debris.
Another mistake is judging only whether the magnet can enter. It must also sit at the intended height, remain aligned and be retained by the specified method. A loose, tilted magnet may make the panel appear uneven even though the surrounding print was accurate.
Record the final fit and any local corrections for the next print. If many pockets require the same adjustment, revise the design allowance or printing setup. A rotary pen is useful for a small defect on an otherwise sound part, but repeated freehand sizing is a poor substitute for consistent pocket geometry.
Frequently Asked Questions
Frequently Asked Questions
Can I use the installed magnet as a sanding guide?
No. Remove magnets before powered plastic cleanup. Contact with the magnet is outside this procedure and can damage its coating or create debris. Measure and inspect the empty pocket instead.
What if the magnet is only slightly too large?
First exclude a raised entrance burr. If the cavity is uniformly undersized, change the design or use a suitably controlled sizing method. Do not assume that an even circular fit can be produced by freehand rotary work.
Is a shallow pocket safe to deepen?
Only a verified design and remaining floor thickness can answer that. If the floor allowance is unknown, stop. A reprint with a corrected recess is preferable to breaking through a visible face.
Should I sand a pocket before painting the model?
Complete fit checks first, then follow the planned coating and assembly sequence. Keep coatings from changing functional seating surfaces unless the design includes that buildup. Recheck the final parts after the coating has cured.
Which H102 attachment should I order for this job?
Provide the pocket diameter, depth, wall thickness and filament to ToolQeen. Request a compatible accessory and its limits for the actual contact geometry. The listed kit quantity is not a substitute for that confirmation.
Final Buyer Recommendation