
Electric Rotary Tool
3D Print Bridge Cleanup: Trim Roughness or Print Again?
Plan 3D print bridge cleanup by separating loose strands, solid raised spots and a sagging roof. Choose careful local finishing or fix the next print instead.
Quick Answer
3D print bridge cleanup begins by deciding whether the underside is merely rough or structurally incomplete. Remove loose debris by an appropriate hand method, then inspect the solid roof behind it. A mini rotary tool may reduce a small accessible raised spot on a robust area. It cannot rebuild a sagging or missing bridge, and thin unsupported strands are poor targets for powered abrasion.
Buyer Takeaways
- Loose strands, solid bumps and a sagging roof are different defects.
- Check the remaining roof structure before trying to make its underside flat.
- Use a rotary pen only where the intended contact and surrounding material are visible.
- Change the print setup when the bridge lacks enough sound material to finish.
What an uneven underside is telling you
A bridge spans open space without support beneath its first strands. Its underside can therefore look different from a supported or top surface even when the part is usable. Inspect the print after it has cooled and been removed from the bed. Compare the opening with the model: a textured ceiling might be acceptable, while a drooping roof that blocks a sliding part changes the function.
Prusa's poor-bridging guidance describes sagging and discusses printing-side improvements. That is useful context, but it does not establish how much material your particular bridge can lose. Look from both ends of the opening. Find whether there is a continuous roof above the roughness or only separated strands. Do not decide from the most attractive viewing angle or assume that hidden layers are intact.
Sort the defect before choosing a tool
First identify loose strings and detached debris. They may obstruct inspection without being part of the load-bearing roof. Remove them with an appropriate hand tool, supporting the part and keeping the tool directed away from you. Do not pull a connected strand until it tears free, because it may draw material out of an otherwise sound region. Stop if a strand continues into the bridge instead of ending as a loose remnant.
Next identify solid raised areas above the intended underside contour. Finally, look for missing material, deep grooves, cracks or an entire sagged span. These are not equivalent sanding jobs. A pit might need a compatible cosmetic filler in a nonfunctional display surface; an incomplete or weakened roof may require a new print. Grinding the neighboring surface down to the bottom of a pit sacrifices additional wall thickness.
Technical Explanation
The lowest strand is not a sanding datum
The visible lowest strand does not necessarily define a safe sanding plane. Removing everything below that plane can also cut into the roof at neighboring points. Remaining thickness, continuity and the function of the opening should determine whether cleanup is justified. This guide does not assign a universal bridge thickness or claim that a cleaned bridge regains the strength of a properly printed one.
Decide whether access is actually sufficient
An open arch may allow a clear approach to a solid outer corner. A deep tunnel often does not. With the tool stopped, check the planned path and make sure the accessory, shaft and chuck can move without touching the sidewalls. If the contact point is hidden, do not rely on sound or feel to judge the result. Reorient the workpiece or choose a suitable hand method.
A narrow strip of supported sandpaper or an appropriately shaped fine file can be easier to control on a shallow accessible roof. Avoid rocking the tool into the corners, where it can change the opening. A flat sanding block is useful only if the geometry gives it a stable reference. None of these alternatives is a reason to remove material from a bridge that is already too thin.
Trial local rotary contact on a representative print
Secure the part by a solid region without pressing on the unsupported span. Wear eye protection and arrange material-appropriate dust capture before working underneath the roof, where debris can accumulate. Remove large supports elsewhere first if they interfere with the fixture. Keep hands out of the rotating attachment's path, and stop fully before clearing dust or changing the part's position.
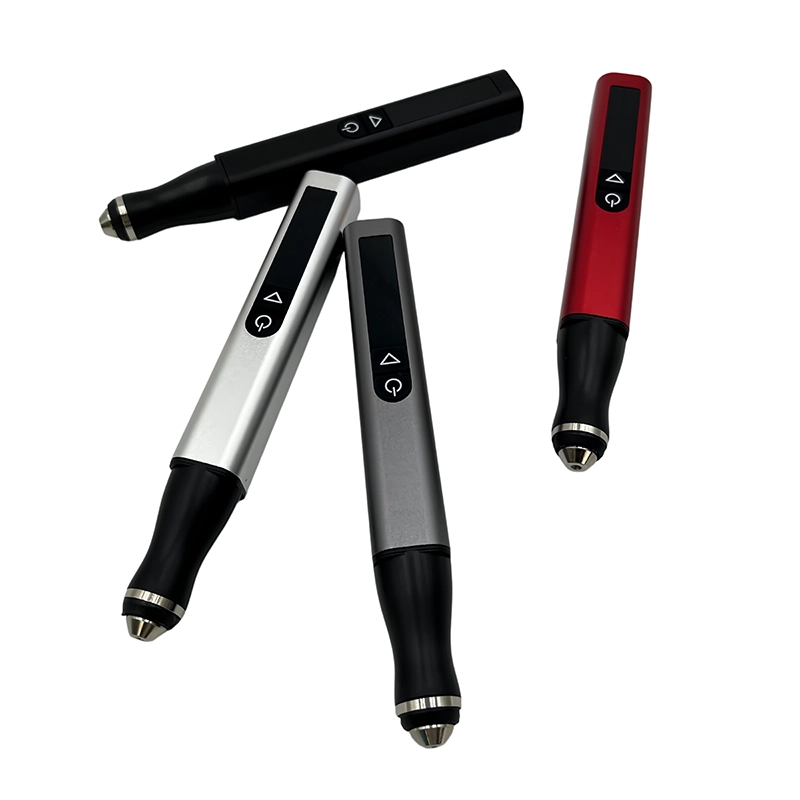
The H102's pen form can help position a confirmed plastic-suitable attachment at an exposed raised spot. Check its 2.35 mm chuck interface, the accessory's instructions and permitted speed. Its five adjustable gears do not supply a universal bridge-cleanup setting. Test the same material and comparable roof geometry on scrap. A solid block is a poor substitute for a thin bridge when judging whether the feature flexes, catches or softens during contact.
Remove the excess, not the roof
If the test and access checks support using the tool, approach only the identified protrusion with brief, light contacts. Inspect after each small correction. Do not sweep the whole ceiling in an attempt to make every strand disappear. Stop if material smears, the bridge moves, a strand lifts or the remaining surface becomes difficult to distinguish from the intended roof. Cooling the electric tool with water is not part of this dry workflow.
PLA can be damaged by concentrated frictional heat, particularly in fine strands. PETG may leave tough strings or smeared material; higher pressure is not the answer. Unfilled ABS and ASA have different material behavior but still require the same geometry assessment. Flexible and filled filaments need their own supported processes. Do not transfer a successful result from one filament label or color to every other print.
Check clearance and appearance separately
Collect debris with the tool stopped and inspect the opening in angled light. Release the part from its fixture before checking dimensions or fit. For a cable passage or sliding component, assess the intended clearance using the actual mating part or a suitable nonforcing check. Do not grind until an unrelated object passes through and call that proof of the correct opening size.
For a painted display model, evaluate the underside at its normal viewing angle. A little even texture can be less noticeable than a smooth but visibly hollowed patch. If shallow cosmetic pits remain, use a filler suitable for the printed material and follow its preparation and curing instructions. Finish cured material by the permitted method, usually with controlled hand sanding in a restricted opening. Keep filler away from functional clearances.
Improve the next bridge instead of repeating the repair
When the whole underside needs correction, return to the print setup. Depending on the model, a different orientation, a shorter unsupported span or appropriate support placement may remove the need for that bridge. Use the printer and filament maker's guidance to adjust bridging behavior. Prusa identifies flow, speed and cooling as relevant variables; its recommendations concern printing, not H102 operating speed.
Test a representative bridge rather than changing several settings at once on a long final model. Preserve the comparison between the original and revised prints, including whether the underside is merely smoother or the roof is actually more complete. Finishing should be the last small correction to a usable print. It is not a way to turn missing printed structure into a sound span.
Frequently Asked Questions
Frequently Asked Questions
Can a rotary pen remove drooping bridge strands?
It may catch or tear thin connected strands. Begin with inspection and an appropriate hand method. Reserve rotary work for an isolated solid raised spot with a supported, visible contact area, rather than using it as a general strand-removal tool.
Should I fill the underside of a failed bridge?
A cosmetic filler can address a suitable shallow surface defect, but it is not evidence of structural repair. Reprint when the roof is incomplete, cracked or unable to provide the intended clearance and support.
Can I work inside a long printed tunnel?
Only use a method that gives adequate access, visibility and control. Do not insert a rotary attachment blindly or improvise a longer unsupported extension. A design or orientation change may be the practical solution.
Will a lower tool setting protect a thin roof?
A setting alone cannot prevent snagging, flexing or accidental wall removal. Tool, attachment, material, restraint and geometry all matter. No low setting makes an unsuitable bridge a safe powered-finishing target.
Is underside texture always a printing failure?
No. Judge the texture against the part's function and appearance requirements. A sound bridge with acceptable clearance may need only debris removal, while a sagged roof that obstructs assembly requires a different decision.
Final Buyer Recommendation