
Electric Rotary Tool
Batch Finishing 3D Prints with a Mini Rotary Tool: A Guide
Batch finishing 3D prints works best with a defined finish, a representative test part and repeatable checks. Plan local rotary cleanup without sanding every copy alike.
Quick Answer
Batch finishing 3D prints works best when each copy is judged against a clear finish and fit requirement. Inspect the group, develop a supported cleanup method on a representative spare part, and record the areas that may be touched. Use the mini rotary tool only on suitable local defects. Check every finished copy individually instead of applying the same amount of sanding to all of them.
Buyer Takeaways
- Define an acceptable result before touching the first production piece.
- A reference print should represent the actual material and difficult geometry.
- Repeat the inspection and setup, not a fixed number of abrasive passes.
- Keep cosmetic acceptance separate from fit and dimensional checks.
Define what the set needs to do
A set of terrain tiles, matching display stands or repeated model panels usually needs visual consistency and predictable assembly. It does not necessarily need every layer line removed. Write down the surfaces that will be visible, the edges people will handle and the interfaces that locate the parts. Decide which small textures are acceptable and which raised defects genuinely obstruct use.
Keep the objective specific. For a tile set, it might be a base that sits without rocking and an undamaged connector. For a display stand, it may be a tidy exposed edge and a correctly fitting insert. These are examples for planning, not claimed ToolQeen production results. Do not choose a finishing target that requires removing useful wall from every copy. Change the print or design when the desired finish is incompatible with the geometry.
Inspect the group before working through it
Lay out the cooled parts and identify differences. Separate sound prints with minor excess from warped parts, cracked features and pieces with deep missing areas. Repeated defects may indicate a printing issue, but not every copy will have the same amount of excess. Keep questionable parts aside until you understand the cause rather than using them to determine how aggressively to finish the whole group.
Remove large supports with an appropriate hand method and inspect the attachment sites. Use photographs or a simple sketch to mark areas that may be touched and areas that must remain intact. Threads, snap arms, thin rims and locating surfaces need particular care. Label parts in a nonfunctional location or keep them in numbered trays so any later problem can be traced to the actual print and finishing decision.
Technical Explanation
Repeat the decision process for each part
Repeatability should describe the inspection and decision process, not identical material removal from variable prints. Applying a fixed number of passes can under-finish one copy and over-finish another. An endpoint tied to the design and final use is more informative than elapsed sanding time. The workflow contains no claimed throughput, defect reduction or ToolQeen batch-test results.
Choose a reference that exposes the difficult part
A convenient solid offcut may test how a filament abrades but not how a thin feature behaves. Use a representative spare print with comparable thickness, orientation and access. Include the awkward area you expect to encounter. An untouched acceptable copy is useful for comparison; do not sacrifice the only good reference to the first experimental pass.
Confirm the tool and attachment instructions for the exact material. Check the H102's 2.35 mm chuck interface, the accessory's mounting and speed limits, and its stated application. Trial a supported setup on the spare before working on the set. Record the selected gear if useful, but do not treat it as a universal RPM recipe. A different filament grade, attachment or geometry requires a new assessment rather than automatic reuse of the note.
Make the setup repeatable without overcomplicating it
Arrange stable workholding, clear lighting and dust control so the intended contact is visible each time. Support strong regions without squeezing thin walls. Use eye protection and respiratory protection appropriate to the material. Keep completed pieces away from loose abrasive dust and separate from parts awaiting support removal. A clean, orderly bench helps prevent a finished surface from being scratched during handling.
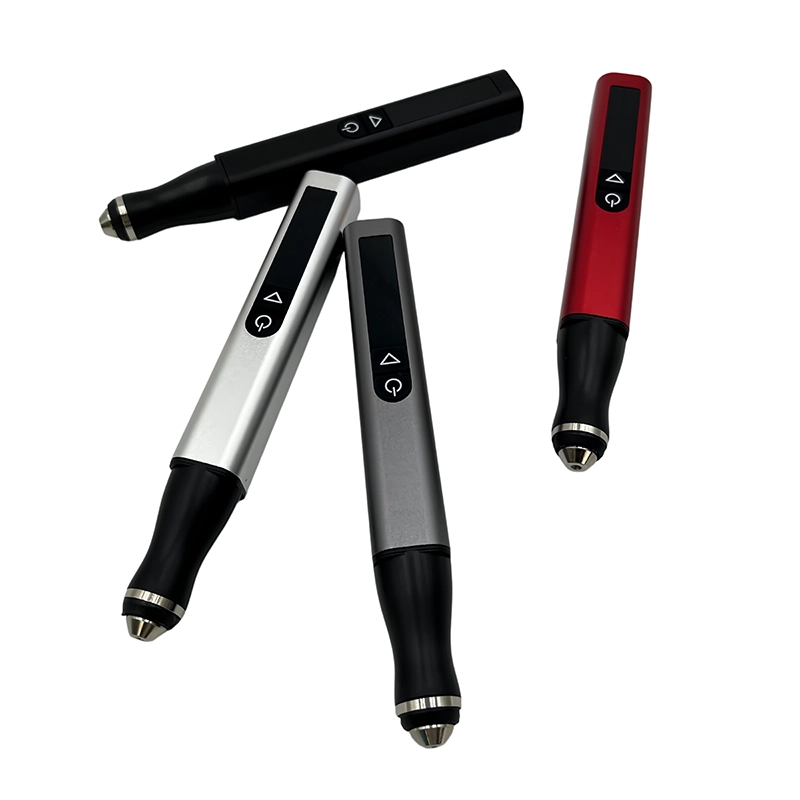
The H102's light pen-style body can help with deliberate local contact, and its digital display can help identify the selected control setting. Neither feature guarantees an identical result across copies. Check each part in the fixture before starting; slight print variation may change support or access. Stop the tool completely before adjusting a clamp, moving a part or changing an attachment. Do not trade away these checks to maintain an assumed production pace.
Repeat the decision, not the amount of removal
On each copy, confirm that the target is raised excess above the intended surface. Use only the supported local method established on the representative test. Make brief contacts and inspect the result. Stop at the planned contour rather than completing a fixed number of passes. A copy with a smaller nub may need less work; a copy with no nub may need none.
Material response can also change if an abrasive loads up or an accessory becomes damaged. Follow its inspection and replacement instructions and stop when contact behavior changes. Do not compensate with more pressure. PLA smearing, flexible walls or a hidden contact point are reasons to reassess the method. Use hand sanding for broad surfaces or delicate transitions when it gives better control. No output rate or time saving is promised by this workflow.
Give every part an individual final check
After the tool stops, collect debris and release the part from its fixture. Inspect its relaxed shape and the cleaned surface. Check fit with the intended counterpart using light hand pressure, looking for both remaining interference and excessive play. For matching pieces, compare the relevant visible edge under consistent lighting. A group can look uniform while one connector has lost material or one base still rocks.
For paint, follow the selected coating system and inspect representative pieces through the full preparation sequence before coating the set. Keep functional surfaces within their intended allowances. For assembly, clean components so dust is not trapped in a sliding or threaded interface. Record the actual reason a part was accepted, set aside or reprinted. Do not let the fact that nine copies passed stand in for checking the tenth.
Feed repeated problems back into the print
If most copies require the same major correction, pause the finishing sequence and inspect the source of the defect. A rough bridge may benefit from an orientation or support change; Prusa's bridging guidance provides printing-side variables to investigate. A mismatch in a joint may need a design or fit adjustment. Removing the same large amount from every part can make an inefficient process look routine without making it appropriate.
Keep the finishing record short enough that you will actually use it. Note the material, attachment identity, approved areas, setup, observed result and any reason to stop. Retain a reference for the next batch, but reassess when the input changes. This is a way to make decisions consistent at a hobby bench, not a claim of statistical process control or a substitute for validation of a demanding mechanical application.
Practical tool
A short finishing record
Adapt this record to the actual parts and instructions. It is a planning aid, not a validated production specification.
Part / revision:
Filament brand and grade:
Visible surfaces and fit requirements:
Areas that may be cleaned:
Areas to leave untouched:
Tool and exact attachment:
Manufacturer-supported setup:
Representative test result:
Individual part inspection:
Reason to accept, stop or reprint:
Frequently Asked Questions
Frequently Asked Questions
Should I use the same gear setting for every copy?
A previously checked setting can be recorded for the same supported setup, but it is not sufficient by itself. Inspect attachment condition, material and geometry on each copy, and reassess if any part of the process changes.
How many test pieces do I need?
This guide does not prescribe a sample count. Choose representative material and geometry, including the difficult feature, and test enough to understand the proposed method. Demanding functional work may need a separate validation plan.
Can I sand all copies for the same amount of time?
Time alone does not define the correct result. The amount of excess can differ, and contact conditions can change. Inspect each part and stop when it reaches the intended contour and fit.
What if every copy has the same large defect?
Investigate the model and printing process before repeating a major manual correction. A revised orientation, support plan or fit allowance may address the cause. Keep previous copies for comparison only where that is useful.
How do I keep the finished set looking consistent?
Define the visible areas and acceptable finish, compare them under consistent light, and test any coating sequence first. Do not grind untouched parts merely to reproduce a dull patch created on one overworked copy.
Final Buyer Recommendation