
Rotary Tool and 3D Print Finishing
Sanding PLA and PETG: Rotary Tool Bits, Heat and Control
A practical guide to sanding PLA and PETG: choose suitable rotary accessories, test heat and surface damage, and know when hand sanding offers better control.
Quick Answer
Sanding PLA and PETG requires a match between the plastic, the shape and the abrasive, not a single RPM recipe. Use supported hand abrasives for flat or delicate surfaces. Consider a mini rotary tool only for accessible local high spots with a confirmed compatible accessory. Test matching scrap first and stop if the plastic softens, the head clogs or the intended contour changes.
Buyer Takeaways
- Accessory shank fit, material suitability and speed rating are separate checks.
- A plastic listing does not validate every filament blend or abrasive.
- A small rotating head is for local work; a block is better for preserving flatness.
- Record the successful scrap setup so you can repeat the same conditions.
Begin with the exact plastic and the finish you need
Sanding PLA and PETG starts with identifying the spool, not the color of the print. Keep the filament name and grade with the part. Standard PLA, a modified tough PLA and a filled decorative blend can behave differently. A familiar appearance is not enough evidence to reuse a previous finishing setup.
Decide whether you are removing a raised support nub, blending scratches or preparing a broad surface for a coating. These jobs require different contact areas. A small excess on a thick wall may suit an approved rotary accessory. A shallow texture across a whole panel usually needs hand sanding with a block.
Also inspect wall thickness, unsupported edges and nearby details. A rigid-looking outer shell may have little solid material behind it. Any method that removes material can uncover infill, soften a corner or change a fitted dimension. Treat a successful finish as both a surface result and a preserved shape.
PLA and PETG do not share a guaranteed sanding recipe
Prusa describes PLA as relatively brittle and heat-sensitive. That makes thin features and extended friction particularly important when choosing a finishing method. Its material guidance recommends water cooling for sanding PLA with paper. This is hand-sanding guidance, not permission to bring water to a cordless pen.
PETG is tougher than PLA in many applications, and Prusa highlights strong layer adhesion and difficult support removal. Those characteristics change how a remnant releases; they do not prove that a fast abrasive is safe. Treat every new PETG grade as a fresh trial and stop if it smears, strings or clogs the working head.
Do not extend either approach automatically to TPU, ABS, ASA, fiber-filled filaments or photopolymer resin. Check their own supplier instructions and safety information. This article focuses on unfilled, rigid FDM PLA and PETG and does not prescribe solvent smoothing, heat treatment or resin finishing.
Technical Explanation
The abrasive surface moves differently from the shank
RPM describes rotation, not the finish. At the same RPM, the rim of a larger head travels farther per turn than the rim of a smaller head. Changing diameter also changes access and contact. Re-test an approved replacement geometry rather than assuming the old setting produces the same result.
Choose head geometry before chasing a grit number
A cylindrical sanding drum can contact a curved edge or the inside of a sufficiently large opening, but it can also round a straight edge and widen a hole. A small point may reach a recess yet concentrate removal into a groove. Neither shape is automatically better because it is smaller.
For a planar enclosure face, wrap abrasive paper around a flat block. For a narrow straight opening, a suitably shaped fine file is easier to keep aligned. For a delicate decorative feature, use a small supported piece of paper and stop if the feature bends. A polishing wheel is not a substitute for removing a support nub or filling a pit.
Choose grit from the abrasive maker's recommendations and the trial result. Begin with the least aggressive option that removes the actual defect. An unnecessarily coarse abrasive creates scratches that need more removal later; an overly fine or clogged abrasive may rub without useful cutting. There is no benefit in following a coarse-to-fine sequence mechanically when the starting surface does not need the coarse stage.
Check the complete accessory connection
The ToolQeen H102 has a listed 2.35 mm metal chuck. Match the accessory shank exactly and check the permitted mounting method. A 3.2 mm or 1/8-inch shank is not a direct fit. Do not force a mismatched shaft, wrap it in tape or assume a different brand's adapter is approved.
Before fitting a head, switch the pen off and disconnect charging power. Inspect the shank and abrasive for damage. Check that the accessory is intended for the plastic and for the kind of contact you plan to make. Its maximum permitted speed must cover the tool setting; a high tool maximum never overrides a lower accessory limit.
If a drum uses a replaceable band and mandrel, treat them as one specified assembly. Confirm diameter, band retention and permitted speed together. The H102 listing's count of 30 accessories does not identify every grit or certify a sanding-drum combination. Ask for the specific head and instructions, not simply a bigger assortment.
Run a small, useful trial before touching the model
Keep a failed print or make a coupon from the same spool with a similar outer wall and raised feature. A solid block of another plastic will not reproduce a thin shell. Secure the coupon, wear eye protection and arrange dust collection suitable for fine plastic debris. Follow the filament and abrasive instructions for respiratory protection.
First check access with the tool off. The working head should reach the high spot without the chuck approaching the finished face. Then use a manufacturer-permitted setting suited to the accessory and plastic. Apply light, short contact and lift away to inspect. Keep fingers and loose clothing outside the rotating area.
Record the tool model, indicated setting, accessory identification, filament and result. Compare the cooled surface with the untouched area. Look for a clean reduction of the raised feature without softened corners, a new hollow or scratches deeper than the original defect. If the result fails, change one factor at a time or return to hand finishing.
Read the surface instead of pushing harder
A shiny smear, a rolled lip, a patch that deforms or plastic building up on the head means the process needs to stop. Switch off and allow the part and accessory to cool before inspection. Clean or replace the abrasive only as its maker directs, with the tool isolated from power.
If little material is coming off, first check whether the abrasive is clogged, worn or unsuitable. Increasing pressure may load a small wall while turning more work into heat. If the accessory chatters, slips or visibly wobbles, correct the setup before continuing; do not try to steady a spinning head by hand.
A lower setting alone does not make unlimited contact safe. Pressure, contact area, dwell time, abrasive condition and wall shape all matter. If an approved setup still cannot remove the nub without damage, a hand file is a valid solution. The useful endpoint is controlled removal, not keeping the motor running.
Finish scratches, low spots and functional edges separately
After local correction, use hand abrasives to blend the transition. Support paper on a block where flatness matters and check the edges repeatedly. Move to a finer stage when the earlier scratch pattern has been reduced, not because a fixed number of strokes has elapsed.
A hollow left by support removal needs a different decision. Where appearance matters and the part remains sound, use a filler compatible with the filament and coating, following its instructions. Avoid sanding the whole surrounding face down to the depth of a single scar. For a functional part, consider whether the defect warrants reprinting instead.
Remove dust before judging the result or applying primer. If you hand wet-sand according to the material guidance, keep the electrical tool elsewhere, collect the residue and let the part dry. Dry-fit mechanical parts before coating, and protect surfaces where an extra paint layer would consume clearance.
Use the H102 specifications as selection information
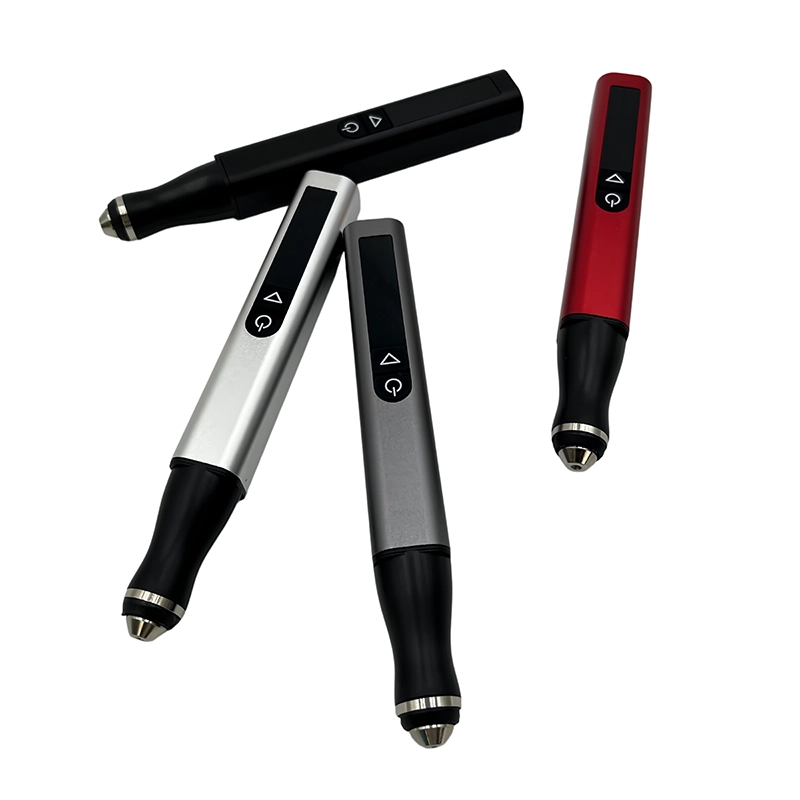
The H102 combines a pen-shaped 59 g body, five speed levels and a digital display. Those features are relevant when you want to position a small working tip and return to the same indicated setting during a trial. They do not establish a measured removal rate or guarantee a damage-free result.
ToolQeen lists plastic carving and model-making uses and a maximum of 30,000 RPM. The public page does not disclose the minimum speed, each step's RPM or a PLA/PETG speed chart. Do not interpret the display as verified closed-loop speed measurement under load, and do not borrow a Dremel accessory's speed recommendation for this pen.
When asking about a suitable kit, give ToolQeen your exact filament, a photo of the defect and the space around it. Request the appropriate 2.35 mm accessory and operating guidance. Confirm whether your chosen consumables are included and how replacements are supplied. A clear match is more useful than a large accessory count.
Frequently Asked Questions
Frequently Asked Questions
Does finer grit always prevent PLA from melting?
No. Grit is only one factor. A fine abrasive can clog or rub, while prolonged contact still generates heat. Watch the cooled scrap result and abrasive condition. Hand sanding may be more suitable than a powered head for the surface you are trying to preserve.
Can I fit a common 1/8-inch sanding mandrel to the H102?
Not directly on the basis of its published specification. The H102 lists a 2.35 mm chuck; a 1/8-inch shank is approximately 3.175 mm. Use only a correctly sized, manufacturer-approved accessory assembly. Do not improvise a fit.
Should PETG use a faster setting than PLA?
There is no verified rule of that kind for this tool. Different support adhesion and toughness do not determine one safe speed. Follow the material and accessory instructions and run a separate trial on the PETG you actually printed.
Are the H102 kit accessories all suitable for plastic sanding?
The H102 product page lists 30 accessories but no complete grit-by-material chart. Confirm the individual head, mounting and operating conditions with ToolQeen. Plastic support in the tool description does not validate every included accessory for every filament.
How can I tell whether to change the abrasive or stop the job?
With the tool stopped, inspect for packed plastic, wear and damage. Replace or clean only according to the accessory instructions. If a suitable fresh abrasive still softens the scrap or removes too much detail, change to a controlled hand method instead of adding pressure.
Final Buyer Recommendation