
Rotary Tool and 3D Print Finishing
How to Clean Up 3D Prints with a Mini Rotary Tool
Learn how to clean up FDM 3D prints with a mini rotary tool, remove raised support marks, protect fine details, and finish surfaces for paint or assembly.
Quick Answer
A mini rotary tool can reduce isolated support nubs and accessible rough edges on a rigid FDM print when the tool, accessory and plastic are suitable. Remove large supports first, test on matching scrap, and use brief, light contact. Finish flat faces and delicate details by hand. Stop if the plastic smears, the part flexes or the accessory catches.
Buyer Takeaways
- Remove excess material only; recessed scars may need filler.
- Keep a sanding block for flat faces and a small file for controlled edges.
- Confirm accessory fit and material suitability before powering the tool.
- Protect thin walls, lettering and mating surfaces from accidental removal.
Read the print before removing material
A print can look nearly finished while a few support nubs spoil the silhouette or stop two pieces fitting together. A mini rotary tool is useful for this local cleanup, especially where a supported overhang meets a thicker body. The aim is to remove a specific obstruction while keeping the shape you printed.
Inspect the cooled part under light coming from the side. Separate raised support remnants, sharp brim edges and rough patches from recessed scars. A bump stands above the intended surface; a pit is missing material. Grinding the surrounding wall down to the bottom of a pit can make a small defect much worse.
Check for cracks, separated layers and exposed infill before starting. A cosmetic finishing tool cannot restore a failed structural print. Decide what “finished” means: a display model needs an acceptable visible surface, while an enclosure needs openings and mating edges that still fit.
Choose where the rotary tool belongs
Good candidates are isolated raised nubs on substantial walls, accessible inside curves and small rough edges where you can clearly see the contact point. The head must reach the excess material without the chuck or another part of the accessory touching the surrounding model.
Use sandpaper on a block for broad flat panels. A block spreads contact across a face; a small rotating head can leave a hollow. A fine hand file gives more deliberate control at a straight edge or opening. Folded abrasive paper can reach a shallow crease without requiring room for a spinning tool.
Miniature fingers, thin fins, embossed lettering and narrow snap tabs usually deserve hand finishing or no intervention. Do not chase invisible layer lines on a surface whose function or detail matters more than smoothness. If holding the piece securely would bend it, choose a gentler method.
Technical Explanation
Raised marks and recessed scars need different repairs
Treat the original contour as your reference. Remove only material above it. A depression below it may need compatible filler, or a new print if the remaining wall is too weak. A rotary tool cannot add material or repair poor layer bonding.
Set up the part and remove large supports
Clear loose filament and unrelated tools from the bench. Wear eye protection before clipping supports; small fragments can fly before sanding even begins. Provide local dust extraction suitable for fine plastic dust, and use respiratory protection appropriate to the filament and abrasive instructions. Keep the work away from food and from an open printer mechanism.
Secure the print in padded jaws or a suitable fixture against a robust area. Do not crush an infill shell or use your fingertips as a clamp next to the working head. Keep hair, loose clothing and jewelry clear. Reposition the fixture whenever reaching the next area would put your hands in the tool path.
Remove the main support structure with suitable hand tools, working in small sections and supporting the model near the contact. Do not twist a large support tree against a thin wall. Leave a stubborn small nub for controlled cleanup instead of pulling out a piece of the finished surface.
Check the accessory, then test matching scrap
A head that physically enters the chuck is not automatically suitable for the material or the operation. Check shank diameter, secure mounting, condition, permitted working surface and speed rating against the instructions supplied with the tool and accessory. Switch the tool off and disconnect charging power before accessory changes. Do not improvise sleeves or adapters for a poor fit.
Choose a failed print or coupon made from the same filament, preferably with a similar wall and support contact. Secure it as you would the finished part. Use the lowest manufacturer-permitted setting appropriate to that accessory and material, with light, brief contact. Inspect the surface after each small pass rather than completing an entire patch at once.
Watch for smearing, softened edges, deep scratches, chatter, a slipping shank or plastic clogging the head. Stop and investigate any of these. A successful scrap trial supports that specific combination; it does not establish a setting for every PLA blend, wall thickness or head.
Trim the high spot and stop before it becomes a hollow
Approach only the raised remnant you identified. Keep the contact moving within that small area, lift away frequently, and let the part cool between passes. Light removal gives you opportunities to check the outline. Pressing harder when cutting slows can increase heat or break a fragile feature.
Stop just before the nub is perfectly flush and finish the last trace by hand. Inspect from more than one angle with the tool stopped. If the original contour is disappearing, change to a file or abrasive paper rather than attempting a corrective powered pass.
PLA needs particular restraint because friction can soften the surface. PETG is a different material, not permission to increase speed. Flexible filaments, fiber-filled grades and resin prints need their own material-specific procedures and dust controls; this guide does not treat them as ordinary rigid FDM plastics.
Blend the repair before painting or assembly
Use supported abrasive paper to blend the small worked area into the surrounding face without rounding an intentional edge. Progress to a finer abrasive only when the previous scratches have been reduced. For PLA hand sanding, Prusa recommends water cooling; keep that separate from the electric tool. The H102 is not presented here as suitable for wet operation.
If a recessed scar remains, use a filler explicitly suitable for the plastic and planned coating, following its curing and sanding instructions. Do not fill a snap joint or a dimensionally important opening merely to improve its appearance. Sanding removes high material; filling restores a low area.
Before painting, remove dust, clean as the coating manufacturer directs, and let the part dry fully. Check compatibility on scrap before committing a model to a primer. Before assembly, inspect the actual mating parts and remove trapped debris. Paint or primer adds thickness, so keep functional contact surfaces clear when needed.
Where the ToolQeen H102 fits
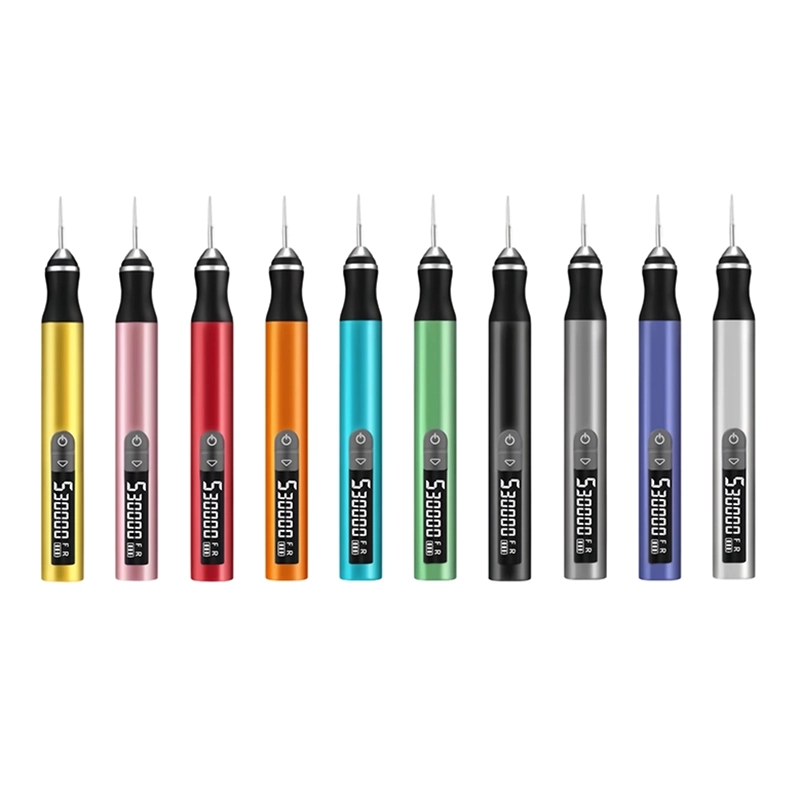
The H102 Cordless Electric Engraving Pen is a candidate for this kind of controlled detail work. ToolQeen lists plastic craft carving and model making among its applications, with a 59 g pen body, five adjustable speed levels, a digital display and a 2.35 mm metal chuck. The pen format lets you place the working tip close to the area you are watching; the part still needs its own secure support.
The advertised maximum is 30,000 RPM. That is a product limit, not a recommended 3D print cleanup speed. The public listing does not specify the minimum RPM or every speed step. It lists 30 accessories without a complete grit and plastic-use chart. Confirm the proposed head and operating guidance for your filament before ordering; do not assume a sanding drum is included or that all 30 heads suit PLA.
Open the H102 product page to review the tool and request the appropriate accessory configuration. ToolQeen currently offers an inquiry-based purchasing route. Individual makers should ask about sample or single-unit availability and shipping rather than assume a retail checkout is available.
Common mistakes that create more finishing work
Removing every visible line with the rotary tool can flatten details before the surface looks uniform. Repeatedly returning to the same warm spot can produce a glossy smear rather than a clean cut. Continuing with a clogged abrasive adds friction without giving useful control.
Another mistake is sanding a pit as if it were a bump. Inspect the defect again whenever a patch grows wider. Finally, check function as well as appearance: a smooth lid that no longer seats squarely is not an improvement. Stop when the obstruction is gone and the intended shape, detail and fit remain.
Frequently Asked Questions
Frequently Asked Questions
Can a mini rotary tool remove supports from an FDM print?
Use hand tools for the main support structure. A suitable rotary accessory may reduce small remaining high spots on a rigid, securely held area after a scrap trial. Avoid using a spinning head to pull, lever or break away large supports.
What RPM should I use for PLA?
There is no verified universal H102 setting for PLA. Follow the tool and accessory instructions, confirm the supported plastic use, and test matching scrap. The listed maximum of 30,000 RPM is not a PLA recommendation. If the lowest suitable setting damages the scrap, finish by hand.
Will sanding remove a white support mark?
Only if the visible mark is associated with removable excess surface material. A color change, stress mark or recessed scar may remain after the area is flush. Do not thin the wall chasing color; consider an appropriate coating or accept the cosmetic mark.
Can I wet-sand with the H102?
No wet-operation approval was found in the public H102 product information. Keep the tool and charging equipment away from water. Where the filament maker recommends wet sanding, use suitable abrasive paper by hand in a separate area, then dry the part.
Which ToolQeen product should I check for this workflow?
Review the H102 Cordless Electric Engraving Pen for its pen format, adjustable speed and listed plastic/model-making uses. Ask ToolQeen to confirm a suitable 2.35 mm accessory, operating guidance and availability for your project before purchasing.
Final Buyer Recommendation